
Data Manager allows you to print Avery mailing labels for a group of Contacts, which comes in handy when doing bulk Microsoft Word Mail Merges of if you just need to generate labels for a bulk mailout that will be stuck onto the front of envelopes. You can print the following Avery Labels from Data Manager:
|
Avery Code |
Product |
Description |
|
L7159 |
White Address Label - Laser |
24 labels per sheet, 64 x 33.8 mm |
|
L7160 |
White Address Label - Laser |
21 labels per sheet, 63.5 x 38.1 mm |
|
L7161 |
White Address Label - Laser |
18 labels per sheet, 63.5 x 46.6 mm |
|
L7162 |
White Address Label - Laser |
16 labels per sheet, 99.1 x 34 mm |
|
L7163 |
White Address Label - Laser |
14 labels per sheet, 99.1 x 38.1 mm |
There are 5 different types of Avery Labels that you can print from Data Manager each with a different number of labels per sheet. You can purchase these Avery labels from most office supply stores. Please ensure you purchase the correct Avery Labels as Data Manager has been designed to print to these label sizes only. If you use a different Avery label code to the ones listed above the labels will not print in the correct location.
For more information on Avery labels you can visit the Avery Australia website at:
To print Avery mailing labels for a group of Contacts from your Data Manager Contacts database:
1. Go to the Data Manager Home Screen.
2. Click the Contacts button.
3. Click the Person Icon to the left of any Contact's First Name (it doesn't matter which Contact you select at this stage). You will now be viewing the full details for the selected Contact. You will now need to search for the Contacts that you wish to print the Avery mailing labels for to so they are in a found subset of records (for example all Customers or Potential Customers). See the section on Searching the Contacts Database for more information on performing a Find.
Important: You can confirm the total Contacts you will be printing the Avery mailing labels for by viewing the navigation details in the top right hand corner to see how many Contacts are in the current found set. For example in the screenshot below there are 50 Contact records in total but there is a foundset of 3 records at present. When I print the Avery mailing labels it will only print labels for those 3 records.
4. Once you have found the Contacts you wish to print the Avery mailing labels for and confirmed you have the correct current found select the Scripts menu from the menu bar at the very top of the screen then Print Avery Mailing Labels then select the specific Avery label you are using (e.g. Print Avery L7162 Labels):

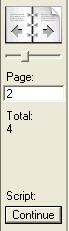
A preview of the selected Avery labels will appear on the screen for review prior to printing - click the Continue button on the left hand side of the screen (or press the Enter key on your keyboard) to display a dialog box giving you 3 choices:
Yes - click Yes to print the Avery labels and continue on with print setup and printer settings
No - click No to return to Data Manager
PDF - click PDF to save a PDF file instead of printing (N.B. the PDF feature is NOT available in Data Manager Solo)

You can use the book flipper in the top left hand corner of the screen to view the 2nd and subsequent pages by clicking the pages with the arrows to move left and right. This is how you can determine the total number label sheets required for this print job:
See the Printing Tips for more information on printing from Data Manager