
Printing from Data Manager is very similar to print from most other applications with a few small differences. We have generally created separate screens for printouts that fit on a an A4 page and are designed to be printed. There is a Print button across the top of the screen in most Data Manager modules that you can click on to print what is on your screen (e.g. a Contact record, an Action Plan, the To Do List etc). When you click a Print button in Data Manager a preview of the printout will appear on the screen for review prior to printing in a new window:
You can use the book flipper in the top left hand corner of the screen to view the 2nd and subsequent pages by clicking the pages with the arrows to move left and right. This is how you can determine the total number of pages for each print job:
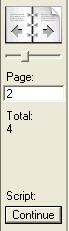
Click the Continue button on the left hand side of the screen (or press the Enter key on your keyboard) to display a dialog box giving you 3 choices:
Yes - click Yes to print the Action Plan and continue on with print setup and printer settings
No - click No to return to Data Manager
PDF - click PDF to save a PDF file instead of printing (N.B. the PDF feature is NOT available in Data Manager Solo)
If you select 1 to print you will be presented the the Print Setup dialog box where you can choose the appropraite Print Setup options (e.g. A4 and Portrait) and after clicking OK you will get the Print dialog box.
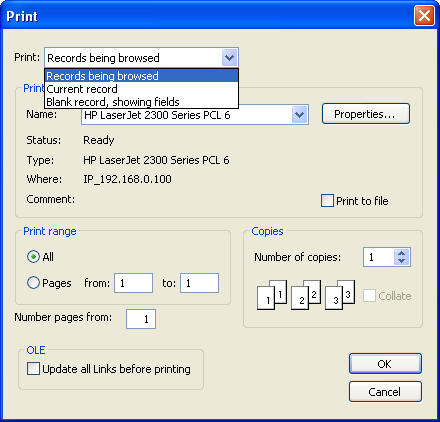
Along with the standard choices that you make when printing from any application (which printer, number of copies, page range etc) there is one additional option you will need to select which appears at the top of the Print dialog box where there is a drop down list next to Print:
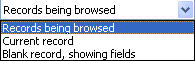
This gives you 3 choices (Data Manager will generally default to the correct option where possible):
Records being browsed - if you are printing more than one record you would select this (e.g. if you were printing your To Do List of 15 activities selecting Records being browsed will print all 15)
Current record - if you are printing a single record you would select this (e.g. if you were printing the contact details for John Smith in the Contacts database it will just print his contact details)
Blank record, showing fields - if you wish to print a blank record without any data select this
Tip: if you are printing a list of Contacts and you get only one record instead of the 20 that you were viewing on the screen you have printed with Current Record selected. Conversely if you print Contact details and you get 20 records instead of just the one you were viewing on the screen you have printed with Records being browsed selected.
If you wish to manually print a PDF file outside of the standard printing routines described above in Data Manager you can do so at any time by selecting from the File menu>Save/Send Records as PDF to create a PDF document. As with printing you can select to create a PDF of either the Current Record or Records being browsed. Generally you will find the built in Print buttons sufficient for the majority of your printing.
As mentioned above the PDF feature is NOT available in Data Manager Solo as a built in feature. However there are a number of cheap/free printer drivers that you can install (if you do not already have a PDF printer driver installed) on your computer to allow you to print to a PDF printer. Some of our clients have recommended the following:
Cute PDF Writer (free)
PDF995 (free)
Please consult the documentation that comes with these PDF printer drivers for assistance or contact the supplier if you have any questions about these products.