Data Manager has a Templates database that lets you store an unlimited number of Email or SMS/TXT message templates that you can use when communicating with your Contacts. Data Manager installs 20 sample Email and SMS/TXT templates. These are intended as a guide to show you what a sample template might look like - you most likely already have your own ermail or SMS templates that you would rather use. If you are planning to use the Templates feature of Data Manager one of the first tasks in setting up Data Manager is to customise the supplied email and SMS/TXT templates.
To customise one of the installed Email and SMS/TXT Templates, open the Templates database as follows:
1. Go to the Data Manager Home Screen.
2. Click the Templates button. A list of the supplied 20 templates will appear.
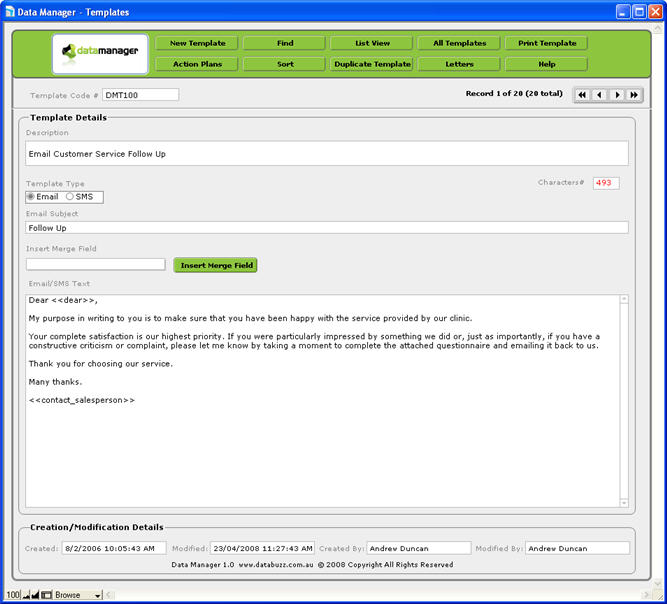
3. Click the Template Details button to the right of the screen to view the full details for a template. You will a screen displayed as follows
This screen displays the full details about a selected Template as follows:
Template Code - this is generated automatically by Data Manager and cannot be changed.
Description - a summary describing the Template (e.g. Vendor SMS Template).
Template Type - select from either Email or SMS.
Characters # - displays the number of characters in the Email/SMS Text field. Remember that SMS templates cannot exceed the 160 character limit.
Email Subject - the subject of the email for the Template.
Insert Merge Field - displays a list of available Merge Fields to enter into the Template.
Email/SMS Text - the actual text of the template including any Merge Fields.
Simply make any changes to the Email/SMS Text field at the bottom. For Email Templates you can also change the Email Subject as required. Remember, SMS Templates must contain no more than 160 characters - the total number of characters is displayed in red in the Characters # field (top right-hand corner of the screen).
Data Manager allows you to include a number of merge fields in a Template so that you can personalise an email or SMS/TXT message when you insert a template from the Contacts database. For example instead of having a message that says "Dear valued customer" you could insert the <<dear>> merge field so that the message would appear as "Dear John" or "Dear Sally". The list of available merge fields with a description is as follows:
|
Merge Field |
Description |
|
<<first_name>> |
The First Name field from the Contacts database |
|
<<surname>> |
The Surname field from the Contacts database |
|
<<company_name>> |
The Company field from the Contacts database |
|
<<dear>> |
The Dear field from the Contacts database |
|
<<formal_greeting>> |
The Formal Greeting field from the Contacts database |
|
<<address_one_postal>> |
The Postal Address Line 1 field from the Contacts database |
|
<<address_two_postal>> |
The Postal Address Line 2 field from the Contacts database |
|
<<suburb_postal>> |
The Postal Address Suburb field from the Contacts database |
|
<<state_postal>> |
The Postal Address State field from the Contacts database |
|
<<postcode_postal>> |
The Postal Address Postcode field from the Contacts database |
|
<<address_one_street>> |
The Street Address Line 1 field from the Contacts database |
|
<<address_two_street>> |
The Street Address Line 2 field from the Contacts database |
|
<<suburb_street>> |
The Street Address Suburb field from the Contacts database |
|
<<state_street>> |
The Street Address State field from the Contacts database |
|
<<postcode_street>> |
The Street Address Postcode field from the Contacts database |
|
<<email>> |
The Email field from the Contacts database |
|
<<contact_salesperson>> |
The Salesperson field from the Contacts database |
|
<<contact_salesperson_email>> |
The email address of the Salesperson field from the Contacts database |
|
<<contact_salesperson_mobile>> |
The mobile phone number of the Salesperson field from the Contacts database |
To insert a Merge Field into a Template:
1. Select the required Merge Field from the Insert Merge Field drop down menu.
2. Position or click the cursor in the Email/SMS Text field where you wish the Merge Field to appear.
3. Click the Insert Merge Field button and the selected Merge Field will be inserted into the text of the Template.
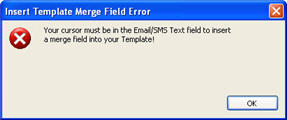
If you do not position the cursor in the Email/SMS Text field immediately before clicking the Insert Merge Field button you will get the following error message:
When you insert an Email or SMS Template Data Manager will substitute the Merge Field for the data from the Contacts database using the matching field from the table above.
To create a new Template, simply click the New Template button and fill in the necessary fields. Make sure you select select either Email or SMS for the Template Type field otherwise the new Template will not appear in the drop down list of available Templates when sending an Email or SMS/TXT message from the Contacts database.
To duplicate an existing Template, simply click the Duplicate Template button when you are viewing the Template you wish to duplicate. A copy of the selected Template will be created with a new Template Code and the word "Copy" will be added to the end of the template description. You can then edit that Template details as required.
To print an existing Template, simply click the Print Template button when you are viewing the Template you wish to print. A preview on the printout will appear on the screen for review prior to printing - click the Continue button on the left hand side of the screen (or press the Enter key on your keyboard) to display a dialog box giving you 3 choices:
Yes - click Yes to print the Template and continue on with print setup and printer settings
No - click No to return to Data Manager
PDF - click PDF to save a PDF file instead of printing (N.B. the PDF feature is NOT available in Data Manager Solo)
If you are on the List View summary layout clicking the Print Template button will print all selected Templates in the list.